Autumn has come knocking on my door, and I'm not sure how I feel about it! Last weekend, it was 92 degrees out and I was lounging in the pool, sipping on a mojito. Today, temperatures peaked in the low 60's! What the heck? I'm not ready for this, and neither are my nails. With its spring time colors, and flowery blooms, today's mani is clearly not autumn inspired at all.
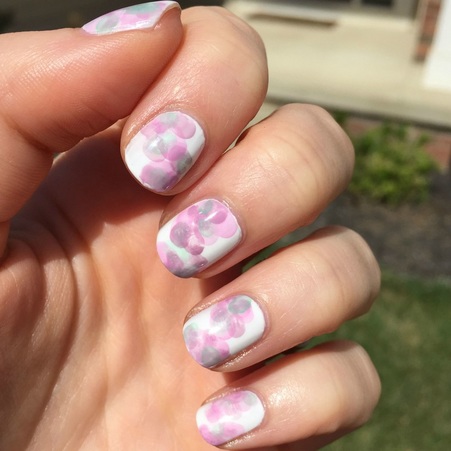
In fact, my mani was inspired by an upcoming wedding! My brother is getting married this Saturday (yay!), so I've been trying out a bunch of different nail options this week, trying to decide on the mani that I will sport for the big day. The wedding colors are lavender, sage, and taupe, with some lace incorporated into the bridesmaids dresses. It will all look very romantic, and inspired me to create the abstract floral look that I have for you today.
In fact, my mani was inspired by an upcoming wedding! My brother is getting married this Saturday (yay!), so I've been trying out a bunch of different nail options this week, trying to decide on the mani that I will sport for the big day. The wedding colors are lavender, sage, and taupe, with some lace incorporated into the bridesmaids dresses. It will all look very romantic, and inspired me to create the abstract floral look that I have for you today.
While it looks like it could be tricky, this technique is actually pretty easy. Not to mention, it's great for beginners due to the fact that it's "abstract" in nature, haha. Perfect for me! I'm no artist!
Start by painting two coats of your favorite white polish to use as the canvas for your watercolor.
Start by painting two coats of your favorite white polish to use as the canvas for your watercolor.
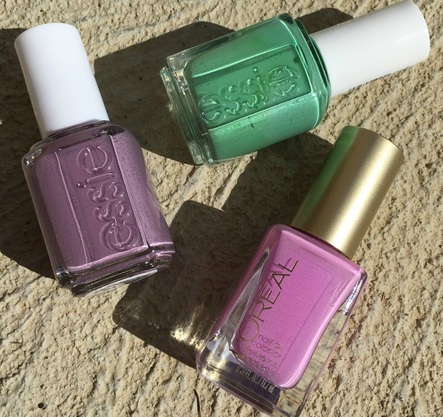
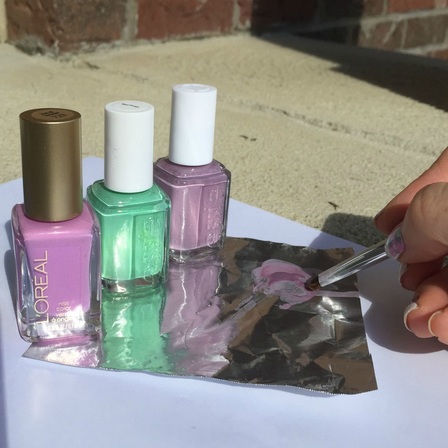
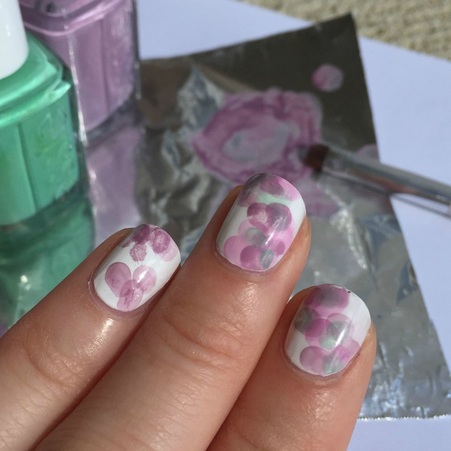
Next, choose three coordinating polishes. I'm using Warm & Toasty Turtleneck and First Timer by Essie, along with Hint of Lavender by L'Oreal. You'll also need a small piece of tin foil, pure acetone, and a small brush (I'm using the Sonia Kashuk brush #105).
The watercolor effect for this mani is created by combining nail polish with acetone. The acetone thins out the polish and causes a blooming effect on your nail, which is really neat! Start by putting a few droplets of your first color on the tin foil. I used Warm & Toasty Turtleneck as my first color since it is the darkest shade that I'm using. Next, dip your brush into the acetone a few times and transfer the acetone onto the tin foil next to your polish. Go back and dip your brush into the acetone one more time and then mix the polish and acetone together.
Lightly dab the nail polish and acetone soaked brush onto your nail, in a rounded flower shape. Make sure you keep your brush pretty damp with acetone to maintain the watercolor effect. If your brush is too dry, the polish will create more of a sticky, spongy look instead of the watercolor effect we're going for. In the picture below, you can see the the dots towards the tip of my nail are darker and more spongy looking because I didn't have enough acetone on my brush. The ones towards my cuticle, however, have the watercolor effect and the polish spread, or "bloomed", when I dabbed the brush onto my nail. This is the look you want.
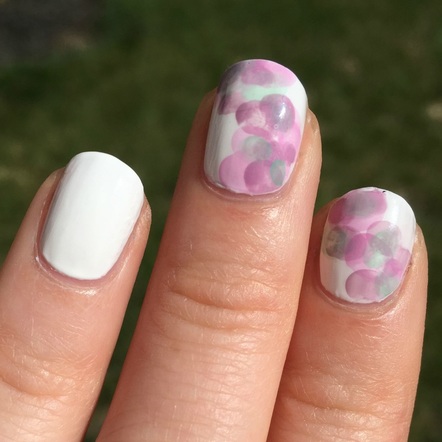
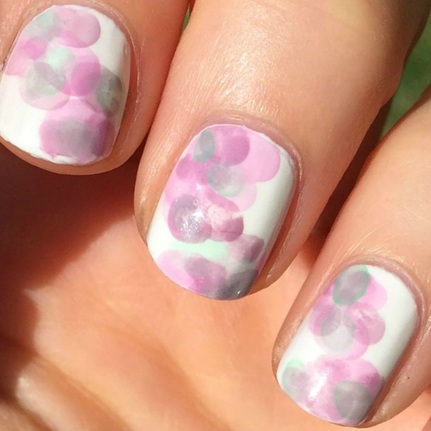
Follow the same technique with your second and third colors, overlapping the petals, but keeping some of the white "canvas" visible. Remember, this is abstract watercolor, so it doesn't need to be perfect.
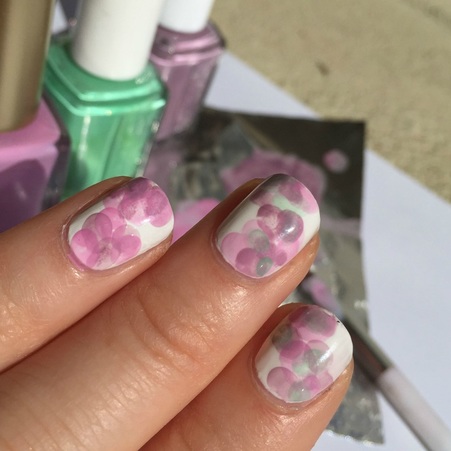

After you've finished the final color, let your nails dry for a few minutes, and then seal your artwork with a good top coat. The top coat really helps to enhance the watercolor look and will leave your artwork nice and glossy. I'm using Essie's gel setter top coat for a long lasting mani. If you'e never used this top coat, check out my review here. It's my new favorite!
Have you ever tried this technique? I think I might try it again in a few weeks using autumn shades once I become more accustomed to the idea of cooler days and sweaters. As far as I'm concerned, it's not autumn until I have a pumpkin spice latte!
Have a great Sunday evening, everyone!
Have a great Sunday evening, everyone!


 RSS Feed
